
Configuring Shipdhlworldwide.com
To Configure the Shipdhlworldwide.com plugin, you will need to access the Shipdhlworldwide.com Admin panel.
To access the Admin panel, make sure the Shipdhlworldwide.com plugin is activated and then navigate to:
Admin Dashboard > WooCommerce > Settings > Shipping > DHL
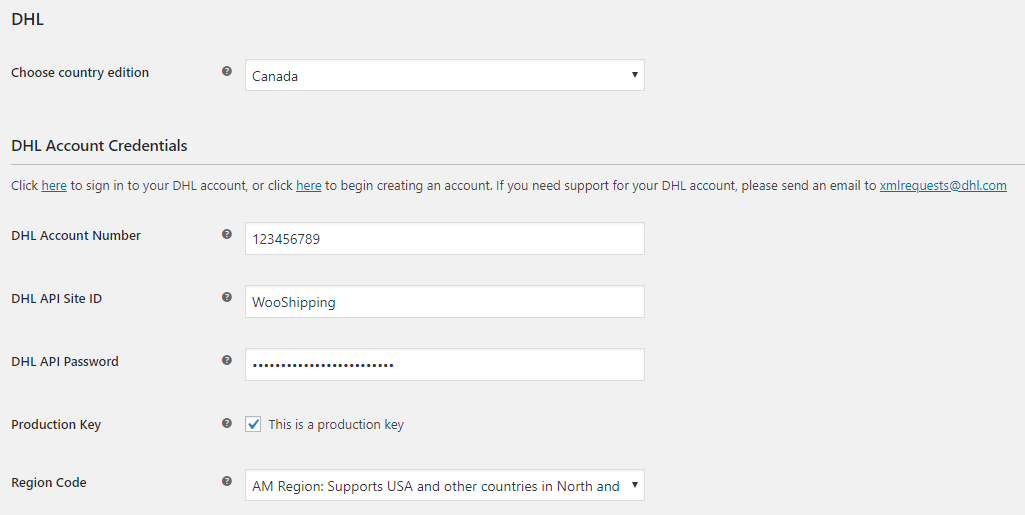
- Country Edition: Choose the Country Edition for your location
- DHL Account Number: Enter your DHL Account Number
- DHL API Site ID: Enter the Site Id provided to you by DHL*
- DHL API Password: Enter the Password provided to you by DHL*
- Production Key: Select when you are ready to start shipping with the WooShipping plugin. If you want to test the system without generating shipping labels, leave this option unchecked.
- Region Code: Choose the appropriate Region Code based on the country of origin
*Please Note: These credentials are different than the credentials that you may already use to access the DHL online site. You will need to obtain your DHL XML credentials (Site Id and Password) from DHL. You can obtain these credentials in one of the following ways:
- Register with DHL to get your XML credentials. You can register here:
https://xmlportal.dhl.com/login
- Customers in the U.S. and Canada can e-mail xmlrequests@dhl.com, with their account information and ask for XML credentials for WordPress/WooCommerce.
- Contact your DHL account representative and ask for XML credentials for WordPress/WooCommerce.
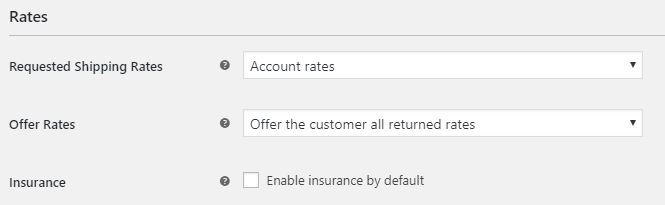
- Requested Shipping Rates: The plugin will return your negotiated rates with DHL.
- Offer Rates: Select Offer the customer all returned rates to show all returned DHL service options and rates in the Shopping Cart as selected in the DHL Service Options section. Select Offer the customer the cheapest rate only to only show the cheapest DHL service option in the Shopping Cart from the options selected in the DHL Service Options section.
- Insurance: Select if you want insurance (also known as “shipment value protection”) included by default on all shipments (this option can be changed for each shipment when creating shipping labels)
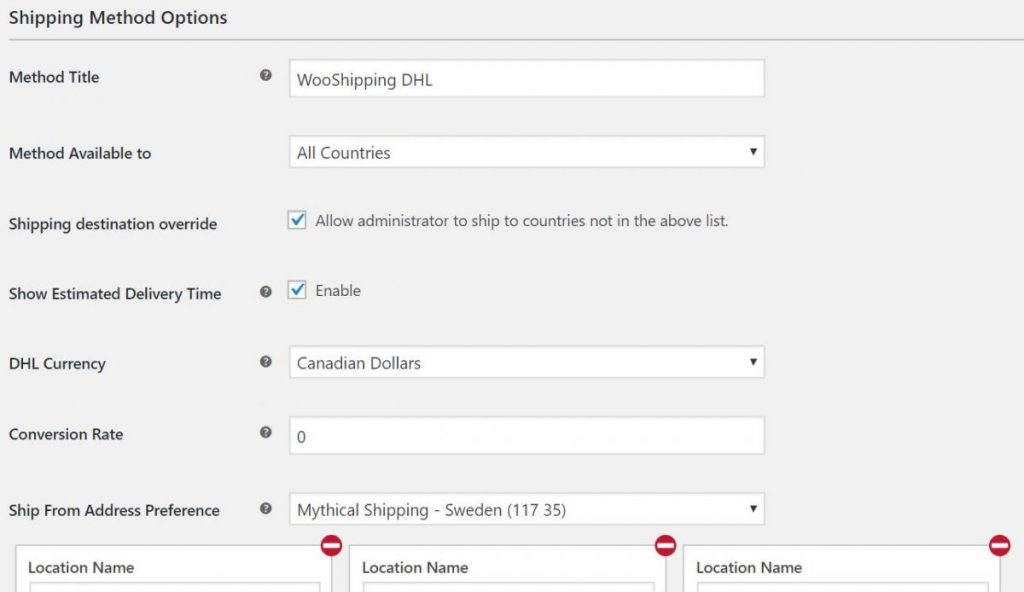
- Method Title: This is the shipping method title shown in the Shopping Cart
- Method Available to: Select the countries that you wish to offer DHL shipping rates in the Shopping Cart
- Shipping Destination Override: Select if you want to give the Administrator the ability to use DHL for all available countries even if not offered in the Shopping Cart
- Show Estimated Delivery Time: Enable this feature if you would like to show Estimated Delivery times in the Shopping Cart
- DHL Currency: Select the currency for DHL shipping rates
- Conversion Rate: Enter the conversion rate from DHL currency to Store currency (leave empty if no conversion is required)
- Ship From Address Preference: Enter at least one shipping originating location (the plugin supports multiple shipping originating locations).
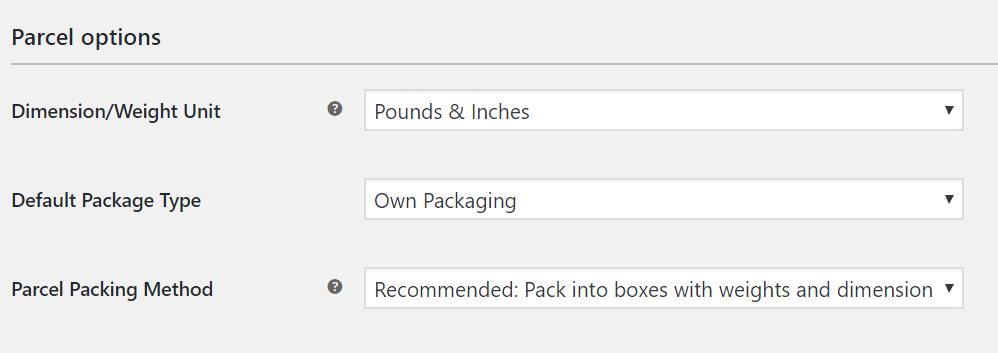
- Dimension/Weight Unit: Select the option that is consistent with the units of measure used in your store
- Default Package Type: Select your preferred default package type (note: this can easily be adjusted when creating a shipping label for an order)
- Parcel Packing Method: Select if you would like the plugin to recommend shipping box sizes or if you want each item in order to ship individually in its own box
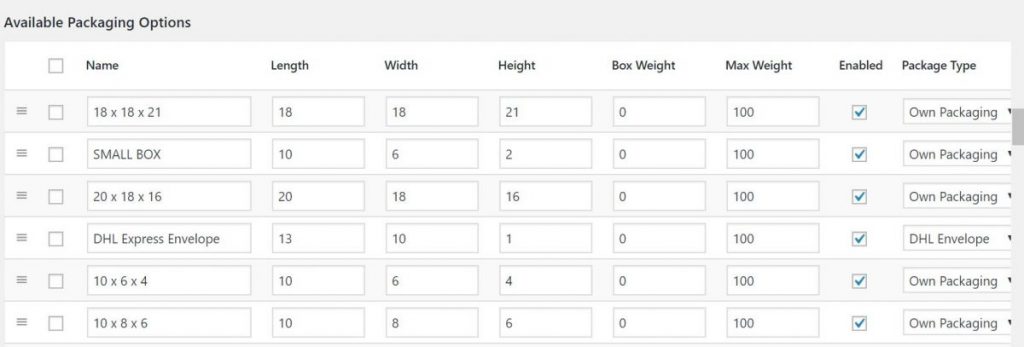
Use this section to enter the packaging options that you regularly use. This includes standard DHL packaging options as well as boxes of a variety of sizes that you use to ship products.
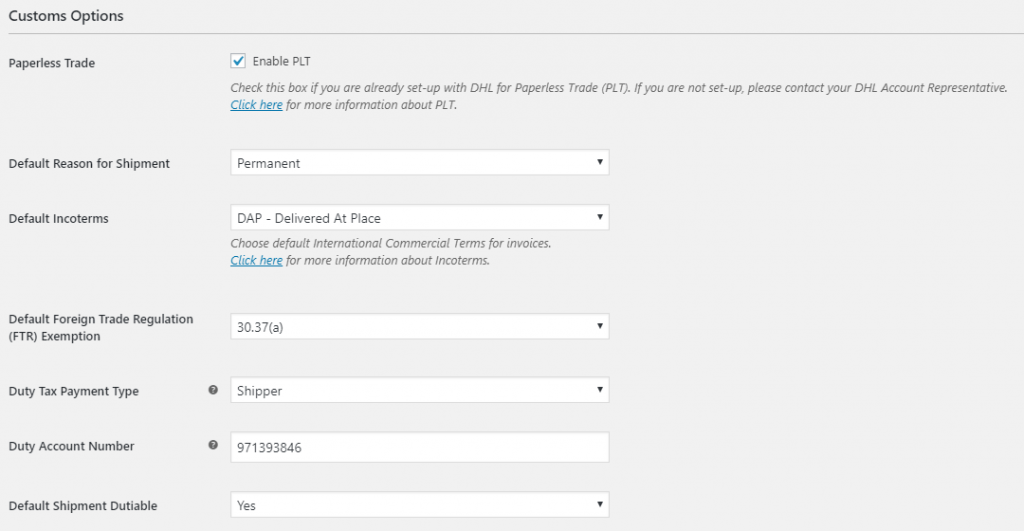
- Paperless Trade: Select this option to allow your Commercial Invoice to be electronically submitted to DHL (Note: you must be set-up with DHL to use Paperless Trade)
- Default Reason for Shipment: Select the default reason for shipments (note: this can easily be adjusted when creating a shipping label for any specific order)
- Default Incoterms: Select the default Incoterms (note: this can easily be adjusted when creating a shipping label for any specific order)
- Default Foreign Trade Regulation (FTR) Exemption: Select (for U.S. shippers only)
- Duty Tax Payment Type: Select to reflect who pays duties and taxes
- Duty Account Number: Enter your account number for duty charges (usually the same as your DHL account number)
- Default Shipment Dutiable: Select “Yes” if your shipments are non-documents, or select “No” if you are mainly shipping documents.
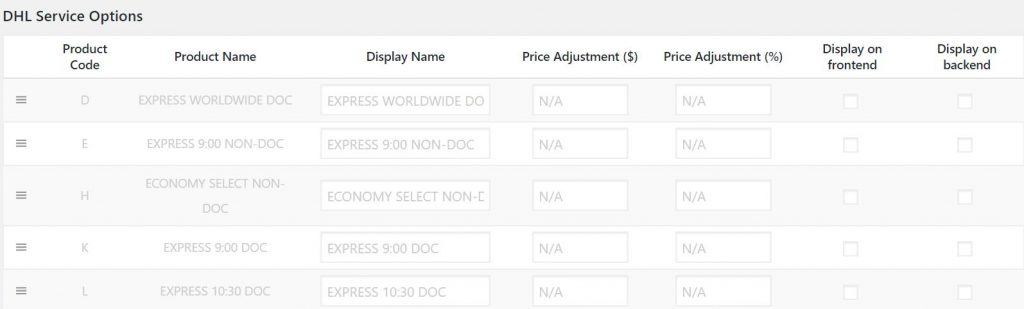
Select the DHL service options that you would like to use for shipping and to provide in the Shopping Cart (they can be the same but do not have to be). You can change the “Display Name” which is what the customer sees in the front end. You can also adjust the DHL rate shown in the Shopping Cart by increasing (or decreasing) your DHL shipping cost by a fixed dollar amount or by a percentage.
You can also set the default shipping service option (note: this can easily be adjusted when creating a shipping label for any specific order)
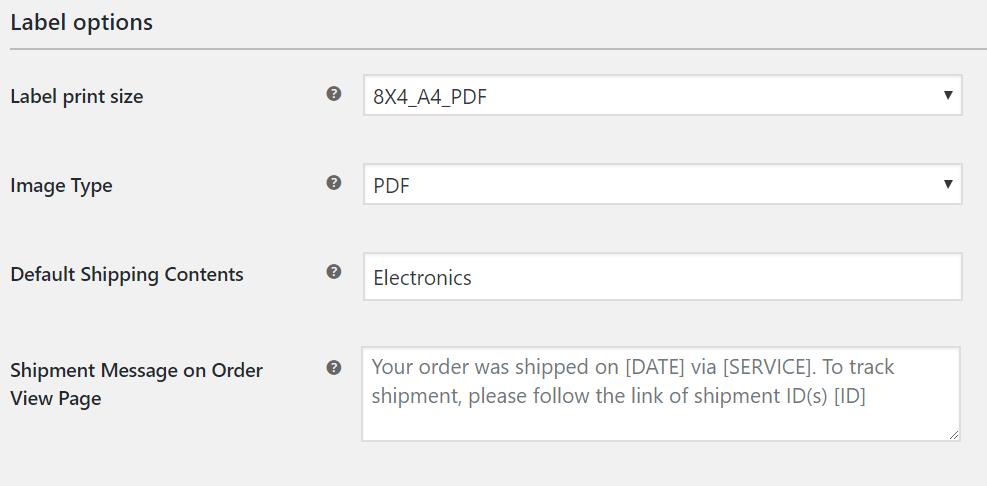
- Label Print Size: Select the label print size based on your printer
- Image Type: Select the label format that you require
- Default Shipping Contents: Enter the default shipping contents which will be reflected on the shipping label (note: this can easily be adjusted when creating a shipping label for any specific order)
- Shipment Message on Order View Page: This an optional message that can be shown on the customers order page when the order status in WooCommerce is changed to “Completed”.
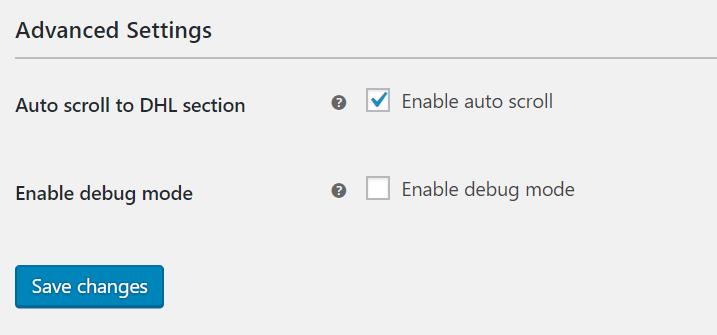
- Auto scroll to DHL section: Enable this feature if you would like your system to auto scroll to the DHL section of an order when generating a DHL shipping label
- Enable debug mode: Only enable to view XML requests and responses (debug mode should only be enabled to investigate plugin issues)